
When developing or testing a website or application that requires secure communication over HTTPS, you might need a certificate to encrypt the data and authenticate the server. However, obtaining a certificate from a trusted certificate authority (CA) can be costly, and time-consuming. In such cases, you can use a self-signed certificate, which is a certificate that you generate and sign yourself, without involving a CA.
Self-signed certificates are useful for internal purposes and testing scenarios, where you only need to verify the server’s identity to yourself or a limited audience.
In this topic, I will share how to create a self-signed certificate, add certificates to Windows, and create a simple HTTPS server using Python. Let’s start.
Requirements
- Python 3.8.0, TLSv1.2 is not supported on Python 3.10.0 or higher.
- Linux subsystem on Windows.
- Clone my source code.
- Wireshark.
Create a certificate using OpenSSL
Step 1: The extfile.cnf in the certificate folder is used to configure the fields of our certificate. Now we add our server’s IP address to this file like below.
subjectAltName=@alt_names
extendedKeyUsage = serverAuth

[alt_names]
IP.1 = 192.168.1.3
IP.2 = 192.168.1.4
IP.3 = 192.168.1.5
IP.4 = 192.168.1.7
IP.5 = 192.168.1.11
IP.6 = 127.0.0.1
IP.7 = 192.168.123.102
subjectAltName: Subject Alternative Name (SAN) is an extension to the X.509 specification that allows users to specify multiple host names or IP addresses for a single SSL certificate.
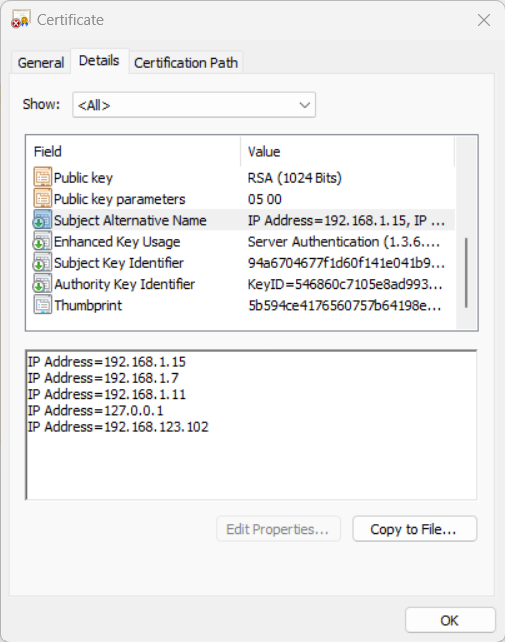
Picture 1. Subject Alternative Name
extendedKeyUsage: Extended Key Usage (EKU) is an extension to the X.509 certificate standard that specifies the purposes for which a certificate can be used, such as server authentication, client authentication, email protection, or code signing.
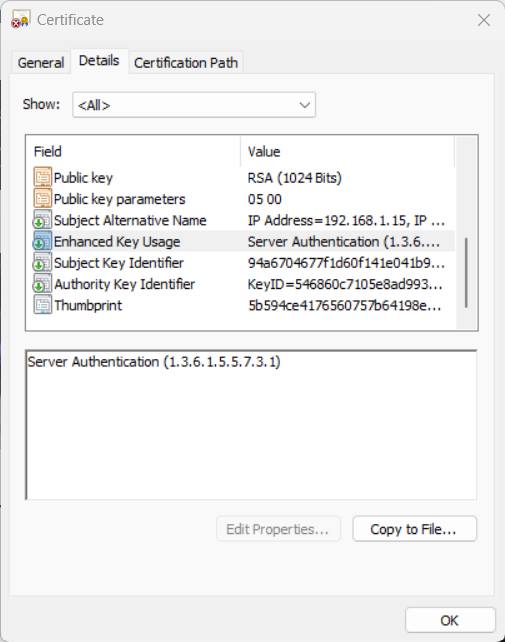
Picture 2. Extended Key Usage
Step 2: Open cmd and type wsl to open Windows Subsystem Linux and then run the certs2h.sh in the certificate folder. We have two certificates root certificate and server’s certificate. The root certificate is used to sign the server’s certificate.
#!/bin/bash

create_cert()
{
    # Create a root CA key
    openssl genrsa -aes256 -out root-ca-key.pem -passout pass:0123456789

    # Create a public CA Cert
    openssl req -new -x509 -sha256 -days 365 -key root-ca-key.pem -out root-ca.pem -subj "/CN=rootCA" -passin pass:0123456789

    # Create RSA key
    openssl genrsa -out cert-key.pem 2048

    # Create a Certificate Signing Request (CSR)
    openssl req -new -sha256 -subj "/CN=tls_server" -key cert-key.pem -out cert-key.csr

    # Signing the certificate by the root CA
    openssl x509 -req -sha256 -days 365 -in cert-key.csr -CA root-ca.pem -CAkey root-ca-key.pem -out cert.pem -extfile extfile.cnf -CAcreateserial -passin pass:0123456789

    # Create full chain
    cat cert.pem > fullchain.pem
    cat root-ca.pem >> ./fullchain.pem

    # export rootCA to import to Client
    openssl pkcs12 -inkey root-ca-key.pem -in root-ca.pem -export -out rootCA.pfx -passin pass:0123456789 -passout pass:0123456789
}

create_cert
Picture 3. Certificate create function
After running the script we got many files but we only care about the fullchain.pem, cert-key.pem and rootCA.pfx.
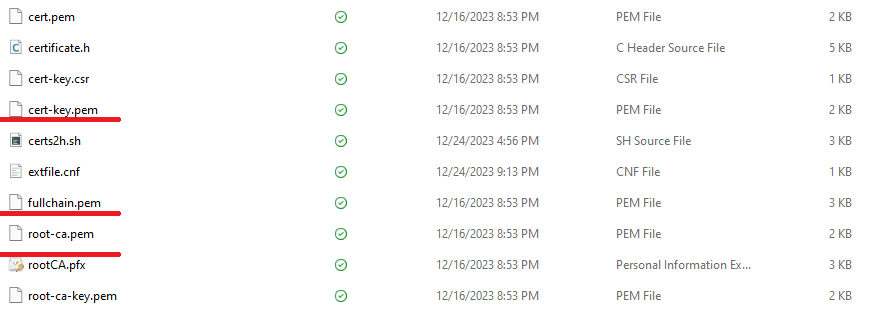
Picture 4. Script’s results
Add the certificate chain to the Windows
Run the server
Run the server.py file to start the HTTPS server.
import http.server
import ssl

server_address = ('127.0.0.1', 443)
httpd = http.server.HTTPServer(server_address, http.server.SimpleHTTPRequestHandler)
httpd.socket = ssl.wrap_socket(httpd.socket,
                               server_side=True,
                               certfile="certificate/fullchain.pem",
                               keyfile="certificate/cert-key.pem",
                               ssl_version=ssl.PROTOCOL_TLSv1_2)
httpd.serve_forever()
Result
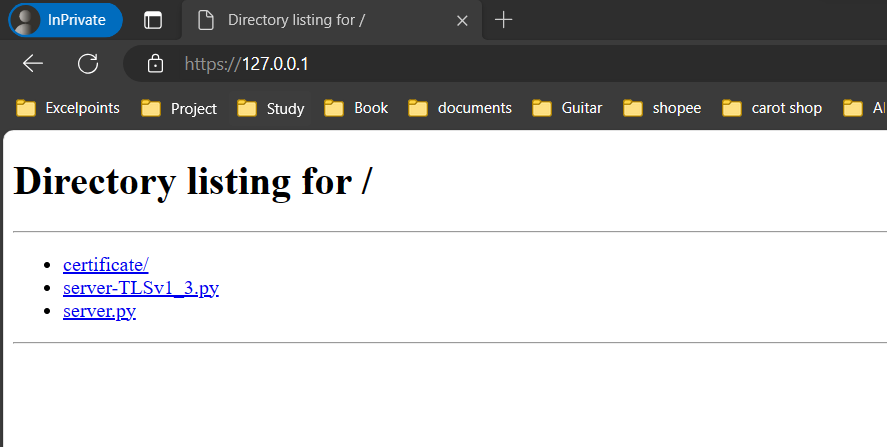
Picture 5. Result on the browser.

Picture 6. Result on the browser.
I hope this topic has been helpful for you to learn how to create a simple HTTPS server. This can be a useful solution for some scenarios where you don’t need to expose your website to the internet, such as local factory networks. Thank you for reading and stay tuned for more!